Handmade Paper for the First Time!
So I was watching TV with my husband who gave me a great idea! He said when he was in elementary they used to make handmade paper, and that I should try it!
Now i’ve heard of artist making handmade paper before but I always thought it would be a tedious and complicated task… I’m so happy to say it’s not!
I’m going to teach you how to make handmade paper, but also being honest with you about how it turns out on the first try!
What you need:
Blender
Bin
Water
Paper
Glue
Strainer
Two frames
Stapler
Fly net or other Netting fabric
Cotton sheets or bed sheets
How to make the Frame:
The frame serves as the sizing template for the paper. You can create the frame by: using two frames from any picture frame, and removing the back end and glass. Make sure they are identical size.
Put a net over one frame and staple it around the back.
The second frame is not netted and goes on top when immersing the frame into the water bin. (This helps to make a uniform shape and the bottom helps catch the pulp).
How to make the Paper:
Tear sheets of paper into small piece approximately 1 inch or less; and let it sit in water. (if you don’t have a blender you might need to let it sit for 24 to 48 hours.
You can bypass this step by using a good blender; however the stronger the paper is the more possible damage to a blender. That’s why letting it soak means less wear and tear on your appliance.
DO NOT use the same blender you use for food. Recycled paper contains chemicals.
Blend paper into a pulp.
Strain the pulp so that its still damp but not soaking. (So here’s where I don’t necessarily understand why if your going to be doing this next step)
Place paper into water bin with about 25% of Elmer’s glue bottle.
Use netted frame to capture the pulp.
Remove the top frame and turn over the bottom frame onto the bed sheets.
Use sponge to soak up excess water; try to get it as dry as possible in this step.
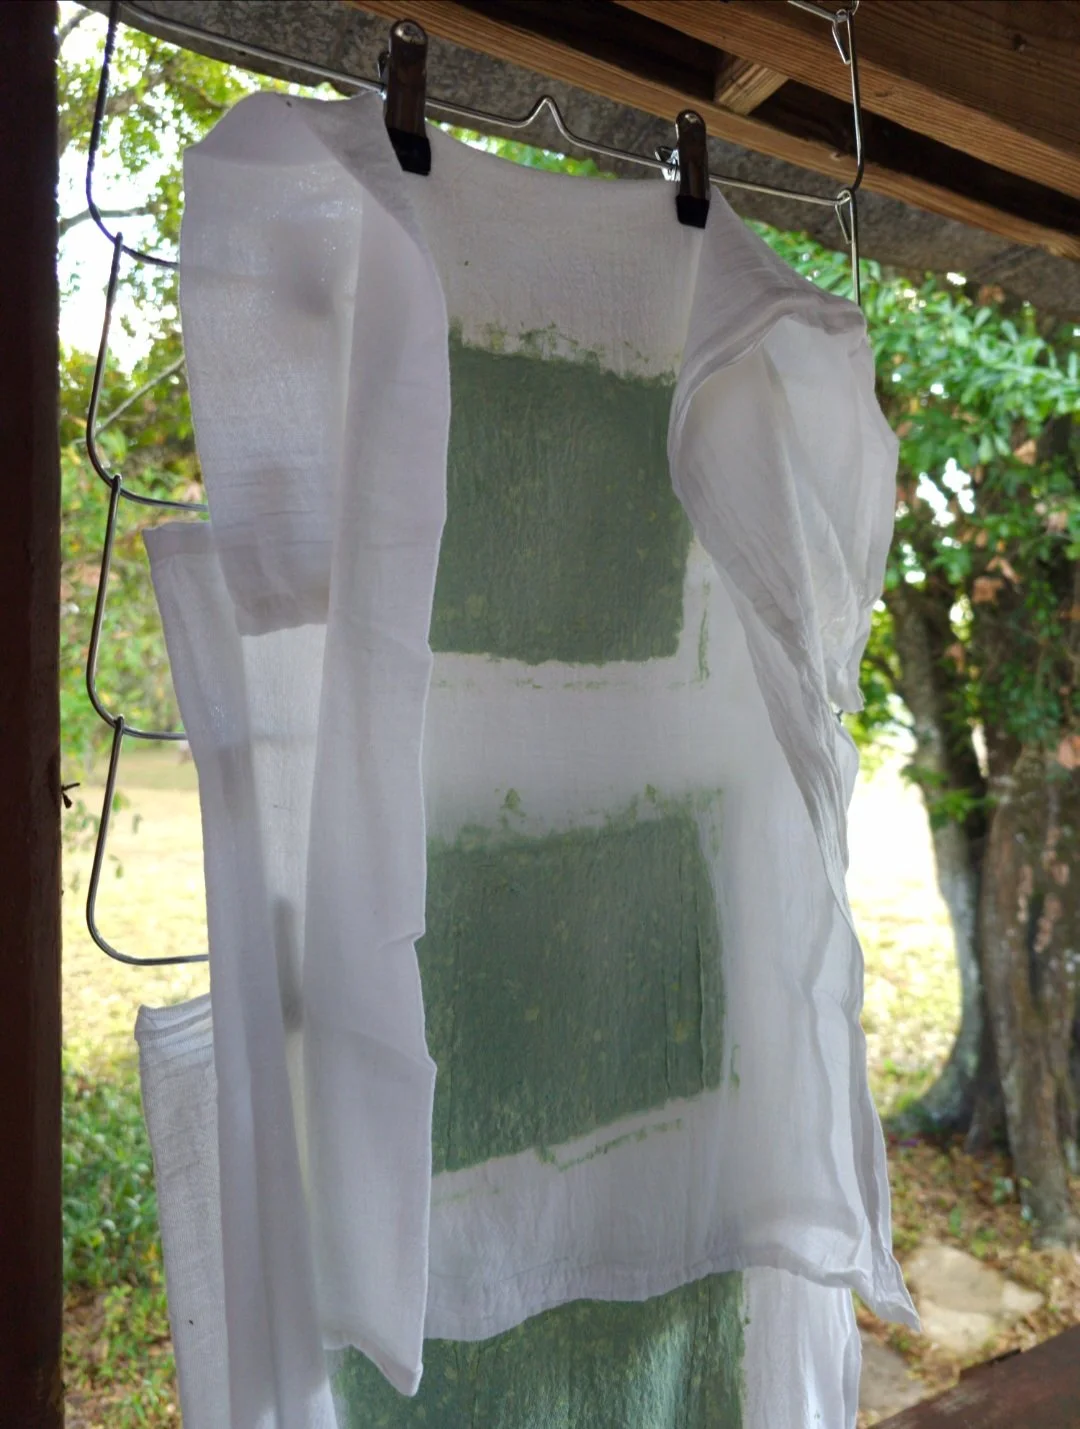
Hang up the sheets to dry.
Once dry; peel the paper off the blanket and your ready to go!
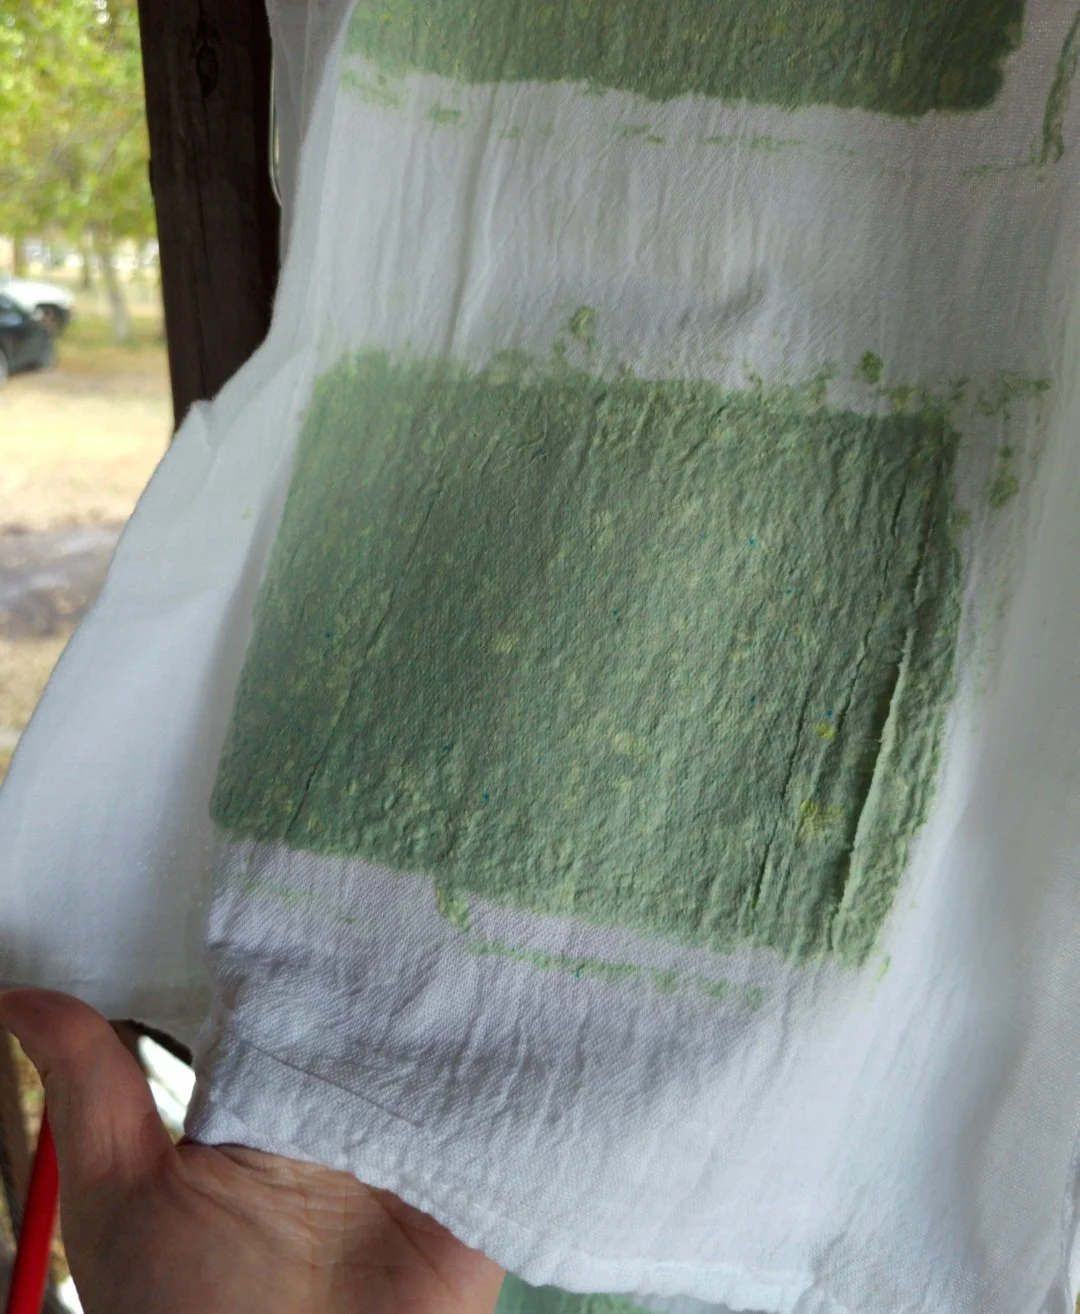
So I used a mix of toilet paper, paper towels, cardstock and ultra thin print paper. The first tries I definitely did not collect enough pulp; and the sheets where ultra thin.
I tried using it for watercolor but as you can guess the paint would not distribute in the paper. Think of it like tissue paper but much more textured. Also side note: my paper is green because I used different colored card stock.
In hindsight, I should have used one color and shredded the colored ones into micro size pieces and put them in on Step 4. This would have given the paper specs of color.
Either way, I definitely liked the green.
Now if you want to make watercolor paper its best to use cotton linter as your “paper”. Do not use cotton balls as they don’t dissolve in the water well.
Here’s some links I found on cotton linter sellers:
https://arnoldgrummer.com/all-about-cotton-linter.html
https://carriagehousepaper.com/cotton-linters-2nd-cut

Would I try this again?
Absolutely. Online they say one pound of cotton linter can produce about 25 to 30 sheets of paper. {size not specified) Imagine the savings and gratification
of creating your own unique cotton paper!
The process is also simple once you get the hang of it; and you don’t need heavy force to do it. Its also so cool to see your handmade paper drying!
I definitely want to try again and let you guys know how it goes!